How to fit Twist&Fit Roman Blinds
Blending traditional chic with modern innovation, our Twist&Fit Roman blinds will transform your windows in seconds.
Specifically designed for recessed windows, this method eliminates the need for drilling or screws unlike traditional Roman blind installations.
Quick and easy to fit, here are the steps, so you can have your new Twist&Fit Roman blind up in no time at all!
Quick Links
WHAT'S IN THE BOX

The blind

The headrail, with chrome chain

Child safety device

Optional adjustment tool
STEP 1 - INSTALLING THE BLIND
Unpack your Twist&Fit Roman blind on a clean, dry surface.
The fabric will be attached to the headrail. Pull back the Roman fabric on each end of the blind, leaving some still attached in the middle.
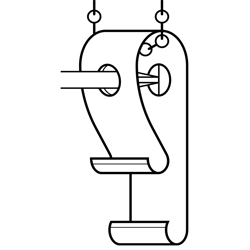
Note that the Twist&Fit plunge end is positioned on the opposite side of the chain control. The twist cog should be closer to the wall side to enable the plunge mechanism before tightening.
Lift the blind into the recess, plunge end first. Ensure you only lift where the fabric is not covering the headrail to avoid creasing or damaging the blind.
Maintain your grip on the headrail and make adjustments to achieve a level position
NOTE: To minimise excess light bleed, we advise fitting the Roman as deep into the recess as possible.

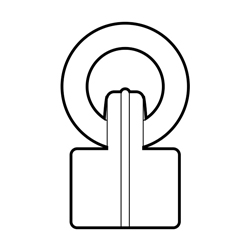
Gently rotate the largest cog on the plunge end so it starts to move towards the blind fabric.
For a right-hand chain control, twist the cog down towards the floor. For a left-hand control, turn it in the opposite direction.
Your blind will come with a small adjustment tool, simply place this over the Twist mechanism to ensure the tension is nice and tight.
Your blind is now secure.
Stick the fabric back onto the headrail, the fabric should provide extra coverage to cover components.


STEP 2 - RELEASING THE BLIND
To take down the blind, grip it firmly and twist the cog towards the wall and gently slide the blind out.
NOTE: If your window is exposed to high humidity or direct sunlight, occasional adjustments to the twist tension may be necessary throughout the year.


CHILD SAFETY
The safety device must be installed at the maximum distance possible from the control mechanism, and at least 1.5 metres from the floor to prevent looped chain becoming slack.
STEP 3 - INSTALLING THE SAFETY DEVICE
Place the safety device on the wall and mark the positioning of the 2 screw holes. Drill holes using a suitable drill bit. Place device into position ensuring the chain is fully taut.
Screw the safety device securely to the wall using suitable fixings.
CHILDREN CAN STRANGLE IF A SAFETY DEVICE IS NOT INSTALLED. ALWAYS USE A SAFETY DEVICE TO KEEP CORDS AND CHAINS OUT OF REACH OF CHILDREN.

Child Safety P-Clip

Raise Cord Safety Device
These blinds have been tested to BSEN16433:2014 and BSEN1634:2014 standard.
Raise cords/tapes used at the back of the blind feature safety break points, which are also designed to snap under pressure.
Simply clip the back break points back together if this happens.

WARNING
Young children can be strangled by loops in pull cords, chains, tapes and inner cords that operate the product.
To avoid strangulation and entanglement, keep cords out of the reach of young children.
Cords may become wrapped around a child’s neck. Move beds, cots and furniture away from window covering cords.
Do not tie cords together. Make sure cords do not twist and create a loop.
CARE TIPS
Reduce dust build-up through regular usage of your Roman blinds.
These drill-free blinds enable you to remove for a full window cleaning. Ensure the surface is fully dry before re-installing the blind.
Check the level of your blind after each cleaning session to reduce any fraying damage.
This blind features a grip which provides able support. Ensure regular tightening in rooms with high moisture levels, such as a bathroom or kitchen.
Roman blinds can be lightly vacuumed with the soft nozzle attachment. Use lukewarm water to remove other stains.
Most of our Roman blinds come with a lining sewn on the back of the blind. Thermal and blackout linings feature an acrylic coating. Due to this, and the delicate nature of the stitch work, please do not machine wash or tumble dry. Please only have dry-cleaned by a specialist dry-cleaner who specialise in “soft cloth” blinds.
Roman blinds, due to the nature of their fabric, may require some 'training' to achieve perfect folds. This is called changing the “fabric memory”. All you need to do is keep the Roman blind up, smoothing the folds down and leave the blind up for around 72 hours.


 Track My Order
 My Account
 Wishlist
 Call now


