How to fit Twist&Fit Wooden Blinds | Blinds fitting guides | 247Blinds.co.uk
Specifically designed for recessed windows, this method eliminates the need for drilling or screws unlike traditional wooden blind instructions.
Adjust your Twist&Fit blind to any position within your recess, ideal for easy access to a top-opening window. The movable twist fitting ensures a secure installation on solid, flat walls.
Step 1 - Installing The Blind
Unpack your blind on a clean, dry surface.
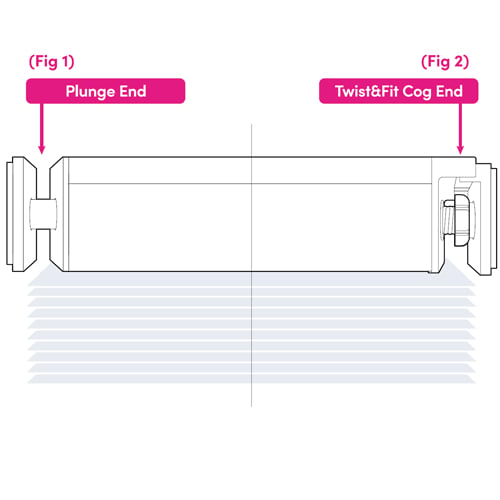
NOTE: The plunge end is positioned on the right-hand side of the blind. The Twist&Fit cog will be on the left; this side is the side used to tighten the blind in the recess.
Guide the plunge end (Fig 2) into your window recess, pressing down on the plunge, then proceed to insert the opposite side of your blind (Fig 1).
Maintain your grip on the blind and make adjustments to achieve a level position.
NOTE: To minimise excess light bleed, we advise pushing the blind as deep into the recess as possible.
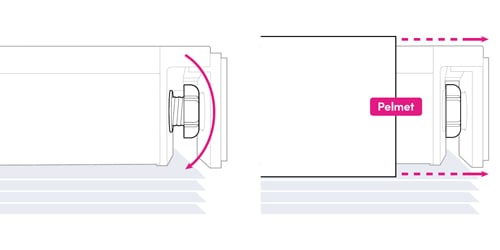
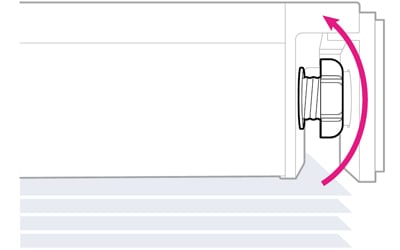
Gently rotate the Twist&Fit cog forwards towards the glass. This will push the ends out, bracing the blind against the recess. Tighten as much as possible, ensuring the blind is as level as possible to avoid stress on the cords.
Add your Velcro tabs and stick the pelmet in place. We recommend that you space the Velcro as evenly as possible, and 10cm away from the ends of the headrail.
Install the cord safety device securely to the wall. For full instructions, please refer to the back page.
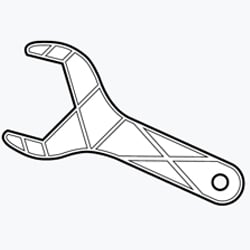
OPTIONAL (FOR DIFFICULT TO REACH BLINDS)
Your blind will come with a small adjustment tool, simply place this over the twist mechanism to ensure the tension is nice and tight.
Step 2 - Releasing The Blind
To release the blind, first ensure the slats have been pulled (so the blind is fully open).
Then, remove the pelmet and grip the headrail firmly and twist the cog towards the room.
For larger blinds, you may want someone to assist you.
NOTE: If your window is exposed to high humidity or direct sunlight, occasional adjustments to the twist tension may be necessary throughout the year.
Child Safety
The safety device must be installed at the maximum distance possible from the control mechanism, and at least 1.5 metres from the floor to prevent looped chain becoming slack.
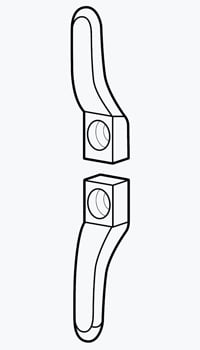
This blind comes with a safety device for screwing to the wall & a cord with a breakable join. This cord condenser is designed to break under pressure and must not be tampered with.
STEP 3 - INSTALLING THE SAFETY DEVICE
Place the safety device on the wall and mark the position of the 2 screw holes. Screw or drill the safety device securely to the wall using suitable fixings. Once secured, loop the control cord around the device in a figure of eight shape, ensuring the cord is as tight as possible.
CHILDREN CAN STRANGLE IF A SAFETY DEVICE IS NOT INSTALLED. ALWAYS USE A SAFETY DEVICE TO KEEP CORDS AND CHAINS OUT OF REACH OF CHILDREN.
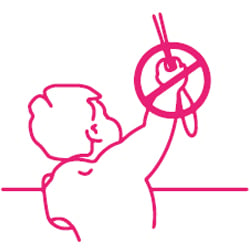
Young children can be strangled by loops in pull cords, chains, tapes and inner cords that operate the product.
To avoid strangulation and entanglement, keep cords out of the reach of young children.
Cords may become wrapped around a child’s neck. Move beds, cots, and furniture away from window covering cords.
Do not tie cords together. Make sure cords do not twist and create a loop.


 Track My Order
 My Account
 Wishlist
 Call now


